We faced an issue with our environment running Openfire 3.6.4 on Debian. The issue was prevalent for some time and we had setup at least 3 Openfire servers which always encounters the same bug.
The tricky part with the issue is that when you have your jabber client running, it continues to function as per normal. It allows you to send IM messages to others or at least you thought only to realize that the other party has not received any of your messages. For new users trying to logon, they will be greeted with the "invalid username or password" error prompt.
Checking at the server will show the high utilization of Java Memory. Openfire forums will usually direct you to increase the JAVA VM, for our case the issue was still prevalant after performing steps on this link.
http://www.igniterealtime.org/community/thread/40364
For those running the Windows platform, they can use this link
http://www.igniterealtime.org/community/message/186030#186030
What actually solved our issue was to disable some jabber clients such as Empathy and setting this property on server properties.
xmpp.pep.enabled to: false
Check out this link. Restart Openfire service and you should be good to go.
http://www.igniterealtime.org/community/message/198454#198454
Wednesday, April 7, 2010
Monday, March 29, 2010
CTX119920 Secure Console Access to XenServer Console

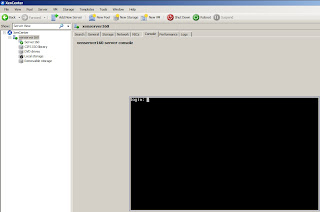
When you need to restrict physical console access to your XenServers, you can force a password authentication prompt rather than being presented with the root console directly.
By design, XenCenter provides full control over XenServer hosts and does not, at the time of this writing, provide role-based administration.
Most operations within XenCenter do not require access to the Console and in some scenarios, it is preferable to restrict access to the Console.
Follow the steps below to enable the XenServer Host Console to prompt for the username and password:
Caution! Take extra care in editing this file because improper editing might prevent you from logging on.
1. Using either an SSH session to your XenServer host(s) or using the Console, edit the /etc/securetty file in either vi or nano:
vi /etc/securetty
2. Add the following lines to the bottom of your /etc/securetty file:
pts/0
pts/1
pts/2
pts/3
(repeat this up to pts/15)
3. Save the changes to the securetty file.
4. Open the /usr/lib/xen/bin/dom0term.sh file in an editor (vi or nano):
vi /usr/lib/xen/bin/dom0term.sh
5. Locate the line in this file that reads “exec /bin/login –f root” and place a “#” symbol at the beginning of the line to comment out the line.
6. Below this line, add a line that reads:
exec /bin/login –p
7. Save this file.
8. Once done, in XenCenter, type exit on your Console terminal. At this stage, you are prompted to log on again.
http://support.citrix.com/article/CTX119920
Subscribe to:
Comments (Atom)


